
We have already discuss much
about the CCcam and in this post you can learn to setup or activate account
/server with Openbox and Dreambox to
work on your just bought or on the old decoders. This will help the new users
and old users and you can see the basic and relevant screenshots to understand
in a detailed way. You will also read about the card sharing technology in this
which will facilitate you to watch digital satellite channels using IP servers.
The software and other things you need are mentioned below and you can do all
this in no time when you go through this post.
CCcam Dreambox is the hardware
you have to get which is powered by some instance of Linux Operating system and
the software you have to get is sharing protocol called CCcam, which is in
charge of setting up a connection with the CCcam server.
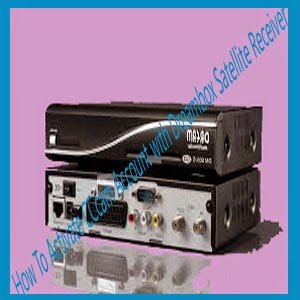
Dreambox Satellite Receiver Requirement for the activation of CCcam Account
·
A well-matched HD Decoders such as Dreambox HD, Openbox
s10, s11 or related to this
·
Network Cable having Rj-45 Plugs which can be
used in connecting receiver to computer
·
Any 3G router or any other device which is equal
to this.
·
A CCcam Account that will give you Cccam.cfg
·
Cross-over
Dreambox Satellite Receive Setup method of a CCcam Account
1)
Connect DSL Internet line with Your Dreambox and
go to blue panel by pressing blue button on remote.
2)
Go to add-ons > Cam and Select CCcam 2.0.11
Complete or latest For Download and then install it.
3)
Then Enable AUTO CAM, from blue the Panel.
4)
After this go to auto cam and change default cam
to CCcam 2.0.11 or the latest which you have installed.
5)
Replace the CCcam.cfg which was sent to you in
VAR/ETC.
6)
For this You Need to Ftp to Dreambox. Connect
your Dreambox to your computer using a cross-over network cable having rj-45
plugs both sides.
7)
After Connecting Your Dreambox to Your Computer,
Open LAN Card Properties > TCP/IP Protocol Properties > Put IP 192.168.0.1
and subnet mask as 255.255.255.0 and then Close the tabs.
8)
Now in Dreambox go to Menu > Setup
9)
Expert Setup > Communication...uncheck DHCP
and put IP 192.168.0.2 and same subnet mask. And save it.
10)
Open Internet Explorer and type
ftp://192.168.0.2/
11)
Default Username: root Password: Dreambox, open
vary folder then etc and replace or paste your CCam.cfg file.
12)
Then Plug the DSL internet line into Dreambox
and go to Menu>setup>expert Setup>communication>Check DHCP and
ENJOY Your Favorite Channels.
Now follow the steps to set CCcam account into Openbox s10:
1)
Download “cccam.cfg” file, overwrite the test
account into it and save the changes.
2)
Add the cccam.cfg file to a USB Stick, do not
zip the file, add it as is
3)
Go to Menu -> Network Local Settings and select
CCcam Plug Setting and click the OK button
4)
select CCcam, cfg [CCcam Plug] and (this
CCcam.cfg will be provided when you buy your CCcam Account/ server) click the
OK button, you should then see a check mark or tick appear, indicating you have
selected the file, if there is no tick shown, then you have not selected
anything and nothing will be installed go over it and double check okay
5)
If there is no tick displayed, select CCcam.cfg
[CCcam Plug] and click OK
6)
Once the tick is displayed, click the Yellow button.
Now select CCcam Plug Setting and click the OK button.
7)
Select the First option “1. CCcam.cfg” and click
the OK button.
8)
Now highlight each cline you wish to activate,
by clicking the OK button, a tick box will appear next to each cline you have
activated.
9)
Now check that your Network Settings are
configured correctly
10)
If your router supports DHCP turn it ON and
click Apply. If your router does not support DHCP you will be
11)
Required to set it up manually, click Apply once
you have set it up correctly, it is recommended that you get a 3G router that
supports DHCP
Now you can setup or activate
your CCcam account /server with Openbox and Dreambox and you can enjoy best
experience in audio and video, if you still have any questions you can comment
below in our comments box we will shortly reply you the best answer.
CCCAM SARVES
ReplyDeleteGood informative post about the Card Sharing Server activation using openbox and dreambox that will help the newbies as well as the experts. Your post is also covering a brief description over how the card sharing technology works. To make your dreambox, software like CCCam and your TV work along to make your card sharing server working, this step by step guide will really help you.
ReplyDeletecccam for humax icord hd+
ReplyDeletesoo
ReplyDeletenice post , i want to implement this feature on my web site.is it possible ?
ReplyDelete04B0D02BE5
ReplyDeletekiralık hacker
hacker arıyorum
kiralık hacker
hacker arıyorum
belek
1D6E2ABD2E
ReplyDeletehacker arıyorum
hacker bul
tütün dünyası
-
-
8B0D8F6F9B
ReplyDeleteTakipçi Satın Al
M3u Listesi
Online Oyunlar
MLBB Hediye Kodu
Total Football Hediye Kodu
ReplyDeleteWhen exploring new methods for custom printing, many artists find that utilizing uv dtf transfer offers excellent results. This innovative technology allows for vibrant, durable designs on a variety of surfaces, making it a popular choice among hobbyists and professionals alike. By choosing the right tools and techniques, you can achieve high-quality prints that stand out. For those interested in expanding their printing capabilities, learning about uv dtf transfer can be a game-changer.
A92A5520
ReplyDeleteesçort bayan adıyaman
ödemiş esçort
erzincan esçort
esçort bayan niğde
karabağlar esçort
esçort aydın
eşme esçort
rize esçort
esçort bayan kastamonu